File Menu


Summary

Open Model...

New Model  |  Plane
New Model  |  Box
New Model  |  Cone
New Model  |  Cylinder
New Model  |  Sphere
New Model  |  GeoSphere
New Model  |  Torus

Import UVs...

Save Model...
Save Template...
Export UVs...
Generate Report...

Recent File(s)

Exit


Description


Open Model...
Open an existing Wavefront (obj) 3D model.

New Model  |  Plane

Creates a new plane primitive.

Create a two dimensional, single sided plane. You can specify width and height in Wavefront (obj) units. You can also specify the number of divisions along the width and height of the plane to create a grid of facets. The texture map resolution is used to calculate the initial size of the texture map based on the dimensions given. The width and height will be multiplied by this value to calculate the overall texture map dimensions. Note: the plane primitive can be extremely useful for generating terrains and other displacement mapped models.  See also: Vertices | Displace.

Plane


New Model  |  Box

Creates a new box primitive.

Parameters include height, width and depth as well as divisions for each dimension. When "gaps in texture map" is checked, there will be a space between the six sides on the texture map. Uncheck this to make one contiguous map. The texture map resolution is used to calculate the initial size of the texture map based on the dimensions given. The default layout for the texture map is the same as for box mapping.

Box


New Model  |  Cone

Creates a new cone primitive.

Parameters include height, bottom diameter and radial divisions. Height and bottom diameter are in standard the Wavefront (obj) units. You can also specify how many divisions you would like in the height and the bottom. Putting a zero in either box will not divide up the bottom or sides vertically (the bottom will be a single facet.) Checking "gaps in texture map" will provide a space between the map of the sides and the map of the bottom. Note: you can create a pyramid by using four in the radial divisions.

Cone


New Model  |  Cylinder

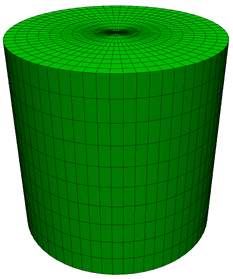
Creates a new cylinder primitive.

Specify height, top diameter, bottom diameter (top and bottom diameters need not be the same value) and number of sides. Set the number of divisions for the sides, top and bottom. Like the cylinder, entering a zero in the divisions box means that part will not be divided (single facet.) When "gaps in texture map" is checked, there will be a space between the sides, top and bottom on the texture map. The texture map resolution is used to calculate the initial size of the texture map based on the dimensions given. Note: you can create a prism by using three for the number of sides.

Cylinder


New Model  |  Sphere

Creates a new sphere primitive.

Options include radius (in Wavefront units) vertical and radial divisions. When "gaps in texture map" is checked, there will be a space on all sides of the texture map. The texture map resolution is used to calculate the initial size of the texture map based on the dimensions given.

Sphere


New Model  |  GeoSphere

Creates a new geosphere primitive.

There are four types of geospheres to choose from; icosahedron with 20 triangular facets, dodecahedron with 12 pentagonal facets, octahedron with 8 triangular facets, and tetrahedron with 4 triangular facets.

Geospheres


New Model  |  Torus

Creates a new torus primitive.

Options include inner radius, outer radius (both in Wavefront units) vertical divisions and radial divisions. By using a larger number of divisions you will get a more refined model, however it also have mode facets and require more memory to load and longer to render. When "gaps in texture map" is checked, there will be a space on all sides of the texture map. The texture map resolution is used to calculate the initial size of the texture map based on the dimensions given. The "rotate (degrees)" setting allows you to adjust the starting position of the texture map on the torus. The seam is normally around the bottom of the torus and can be moved to the top with a value of 180 degrees.

Torus


Import UVs...
Import UV coordinates from a .uvs file.

Use this command to apply an existing set of texture coordinates to the currently loaded model. The .uvs file is a subset of the Wavefront .obj file format. While the .obj file format contains information including vertices, normal vectors, texture coordinates, and facet data the .uvs file only contains texture coordinates and minimal information about how they"re applied to each facet. Because the .uvs file does not contain any information about the geometry of the original model, it is an excellent method for distributing updated mapping for copyrighted models. Group, material and region information are included in the .uvs file so if you need to change the facets for a given material for example, you can do this.

Note: UVMapper Professional has the ability to save the texture coordinates for portions of a model in addition to saving the entire model. This ability can be used to overlay portions of a model that share the same geometry like leaves for a houseplant or feathers.

Save Model...

Save the current model in the Wavefront (obj) format.  Brings up the OBJ Export Options dialog box with the following options:

Note:  these options are saved by UVMapper Professional between sessions, so if you're having trouble getting desired results when exporting your model, try clicking on the Defaults button before saving.  This will restore the default settings and hopefully solve the problem.

Export As Single Group

Save the model with only one group name, "Figure 1" which includes all facets of the model.

Don't Export Normals

Do not include normal vectors or references to them when saving the model.  This can be useful for significantly decreasing the size of you .obj file, especially when using programs that ignore a model's normal vectors and calculate their own, such as Poser from Curious Labs.

Don't Export UV Coordinates

If you'd like to generate a model without UV (texture) coordinates or references to them, select this option.

Flip Texture (UV) Coordinates Vertically

Flip the entire texture map vertically.  This is useful if your rendering program uses a nonstandard convention for texture coordinates.

Flip Texture (UV) Coordinates Horizontally

Flip the entire texture map horizontally.  This is useful if your rendering program uses a nonstandard convention for texture coordinates.

Reverse Winding Order

Reverse the winding order for all facets.  Because many rendering programs use the winding order of a facet to determine which direction it is facing, this option can be used to correct models that load into your rendering program "inside out."

Invert Normals

Invert the direction of all normal vectors.  Normal vectors are used by some programs to make the model appear smooth instead of faceted.  If your model appears inside out when rendering in another program, selecting this option may help.

Swap Coordinates Y and Z

UVMapper Professional uses a right hand coordinate system.  Select this option if your model is to be used in a program that uses a left handed coordinate system.

Don't Export Materials

Do not include materials when saving your model.

Don't Export UVMapper Regions

UVMapper Professional allows you to define groups of facets as regions.  Regions, like groups and materials, are simply collections of facets that you can easily select and manipulate, without changing the group or material setting for your model.  Because regions are not supported by the Wavefront (.obj) file format UVMapper Professional saves these settings as comments in the file.  Because of this, if you load your model into another program that does not preserve comments (most don't) you will loose your region settings.  If you would rather not have regions included in your model select this option.

Export Using Rotation Settings

Use this option if you would like to update the rotation of your model based on the Rotate Model dialog settings.  See also: Map Menu.

Don't Export Linefeeds (Mac compatible)

If you're going to be sharing your model with people who might be using a Macintosh computer, you can use this setting to remove linefeeds from your model.  IBM compatable computers end each line of text with both a carrage return and a linefeed.  Macintosh computers only require a carrage return.

Don't compess texture coordinates

Duplicate texture coordinates are normally combined into a single coordinate when exporting your model.  If you would rather this not be done, select this option.  Warning:  this can greatly increase the size of your model.

Don't Export Material Library 

Don't export the corresponding material library or any reference to it for this model.  See also:  Material Properties.


Save Template...
Export current texture map template.

Use this command to save the texture map template for the currently loaded model. UVMapper Professional displays the Save As dialog box so you can name the template. The coloring of the texture template depends upon the current color setting (see the "Color" command on the Map menu.) You can select black and white, or color the template by group, material or region. After selecting Save Template... from the main menu, you will be presented with a list of options that will be used to generate your texture map template. Under Bitmap Settings you will be asked what size you would like the template to be. UVMapper Professional will recommend a size based on how you mapped the model and what size the last texture map template was, if one was saved before. Feel free to change these dimensions to anything you'd like. Because texture coordinates are relative (stored as percentages of the texture map size) you don't need to worry about preserving the aspect ratio, or the overall size of the texture map. You also need to select the type of template you would like; RGB Color anti-aliased, RGB Color or 256 Color (smaller file size). While the RGB formats take up almost three times the disk space of the 256 color image, you will probably need the template in RGB format before editing it anyway. This is why RGB (also known as 24 bit color) format is the default. Other options include Flip Texture Map vertically, Flip Texture Map Horizontally and Include Hidden Facets. If you'd like to make a template that includes all facets, even those that are currently hidden on the 2D display, check the Include Hidden Facets options.

Note: it's a good idea to keep in mind that many rendering programs and hardware are optimized for texture maps that are square with dimensions that are a power of two (e.g. 256x256, 512x512, 1024x1024, etc.) Because of this, you may save memory and rendering time by selecting one of these sizes for your textures.

Export UVs...
Export UV coordinates to a .uvs file.

Generate Report...
Use this command to generate a text report for the currently loaded Wavefront (obj) model. This can be useful when attempting to apply .uvs files or reorder vertices based on a second model. The text report includes information on the whole model, each group and material.

The following is example output from the Generate Report command used on the Poser cat model:


afb5f9d0 - 10340 facets - 9634 vertices - model

afb5f9d0 - 10340 facets - 9634 vertices - group Figure_1

289297a2 - 5774 facets = 5735 vertices - material fur
9c837305 - 1411 facets = 1268 vertices - material footPads
861c53bb - 2180 facets = 2016 vertices - material teeth
0005a05a - 24 facets = 28 vertices - material pupil
44fd4c05 - 136 facets = 140 vertices - material eyeBall
b0251e88 - 246 facets = 264 vertices - material whiskers

fb132aab - 144 facets = 154 vertices - material innerMouth
75791196 - 65 facets = 66 vertices - material nose
16835878 - 42 facets = 47 vertices - material eyeSocket
b69f0827 - 202 facets = 230 vertices - material innerEar
9293f96e - 116 facets = 123 vertices - material tongue


The first number is used to compare collections of facets to see if they're compatible for applying texture coordinates and reordering vertices. If two collections of facets have the same CRC (cyclic redundancy check, the first number) facet count and vertex count there's a very good chance that they share the exact same geometry.

Note: If you are attempting to apply texture coordinates (.uvs file) or reorder a model based on another model and are getting the dreaded "incompatible facet structure" it's usually because one or all of these three numbers do not match. Generate a report on both models and compare the results. You should be able to see right away if the models are the same or differ in some way.

Recent File(s)
The four most recently loaded files appear here for easy access.

Exit
Exits UVMapper Professional.