| Using the Relax UVs feature | |
|
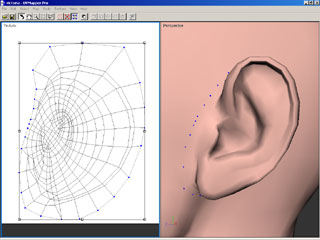
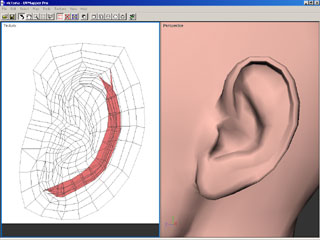
The purpose of this tutorial is to demonstrate how to easily create texture templates from models with multiple texture maps using UVMapper Professional. I'll be using the Victoria mesh available from DAZ3D, but the procedure shown here should work fine with any model you choose. Start by loading the model into UVMapper Professional and adjusting the 3D preview so it resembles the screenshot to the left. You can do this by using the Rotate and Zoom tools on the toolbar (see below). Right click on the ear in the 3D preview window and choose Select UV Set, as shown.
|
|
|
|
Choose Select | Display | Hide Unselected from the main menu or press the hotkey ' (apostrophe) to hide the rest of the mesh while we work on the ear. Use the Rotate and Zoom tools in both the 2D and 3D preview windows to display the portion of the mesh that we'll be working with. Note: you can zoom in on the selection and center it for rotation in the 3D preview window by choosing View | Reset View from the main menu, or by presing the hotkey backspace. |
|
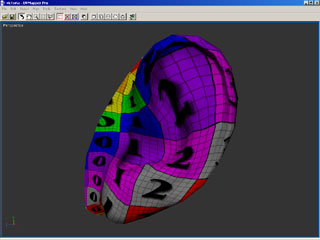
By clicking on the 2D preview so that it becomes the current viewport and selecting View | Back Face and View | White so that they are both checked on the main menu, UVMapper Professional will automatically highlight inverted facets in red. Any facets that are shown in red will have the texture map displayed backwards when rendering. We'll correct this problem in the next step by flattening the texture map. |
|
|
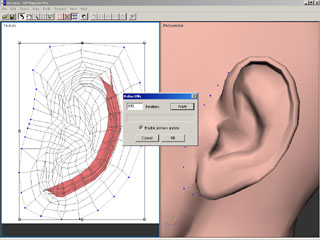
Choose Select | Select Method | by Edge from the main menu, or simply click on the Select by Edge tool on the toolbar (see below.) Choose Select | All from the main menu, or press the hotkey Ctrl+A to select all edge vertices that are currently displayed. All vertices that are either selected or hidden are pinned down will not be moved by the Relax UVs routine. Choose Tools | UVs | Relax from the main menu, or press the hotkey Shift+Ctrl+R to bring up the Relax UVs dialog box. Change the number of iterations to 850 and press the Apply button.
|
|
|
Once you're happy with the results, click the OK button to dismiss the Relax UVs dialog. Press Enter to clear the selection and save your changes. Notice that there are no longer any facets shown in red indicating that the mapping has now been completely flattened. Note: if you'd like to continue the process, you can keep pressing the Apply button. While the relax routine is running, pressing Cancel will cause it to stop. Pressing Cancel when the routine is not running will undo the changes you've made using the Relax UVs routine and dismiss the dialog box. |
|
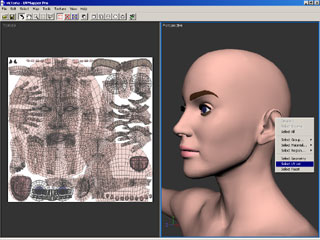
For demonstration purposes, I've centered and enlarged the mapping for the ear and displayed the results using the built in reference texture map (Texture | Checker | Color from the main menu.) You can see that there is no longer any overlap of the facets, and that the texure now follows the geometry of the mesh nicely. |
 Rotate Tool
  Zoom Tool
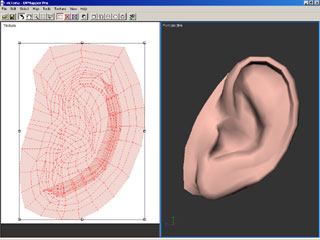
 Select by
Edge
Select by
Edge